> ## Documentation Index
> Fetch the complete documentation index at: https://docs.pureclarity.com/llms.txt
> Use this file to discover all available pages before exploring further.
# WooCommerce Installation
> Complete guide to installing and setting up the PureClarity WooCommerce plugin
The PureClarity for WooCommerce plugin provides comprehensive e-commerce personalization capabilities for your WordPress-based store.
## Plugin Features
The PureClarity WooCommerce plugin includes:
* **Free Trial Access** - 30-day trial signup directly from your admin panel
* **Guided Setup** - Step-by-step initial configuration assistance
* **Automatic Zone Creation** - Pre-configured zones for key pages:
* Home Page
* Product Page
* Search Results Page
* Basket Page
* Order Confirmation Page
* **Data Synchronization** - Scheduled feeds and real-time deltas for data integrity
* **Event Tracking** - Frontend analytics to power personalized recommendations
## Installation Methods
Choose from two installation approaches:
### Method 1: Direct WordPress Installation
This is the recommended method for most users as it handles updates automatically.
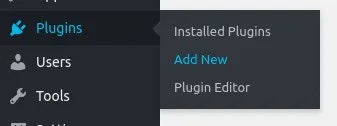
1. Navigate to **Plugins > Add New** in your WordPress admin panel
 2. Search for "PureClarity" in the plugin directory
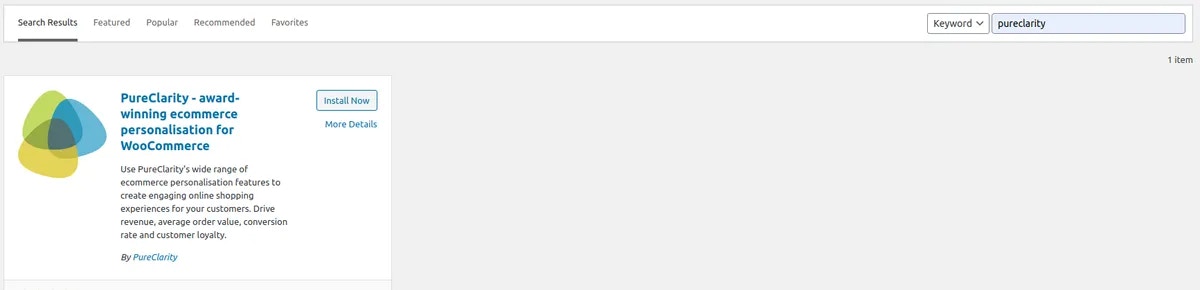 3. Click **"Install Now"** to automatically download and install the plugin
4. After installation completes, click **"Activate"** to enable the plugin
3. Click **"Install Now"** to automatically download and install the plugin
4. After installation completes, click **"Activate"** to enable the plugin
 5. You'll see a new "PureClarity" menu item in your WordPress admin menu
 ### Method 2: Manual Download Installation
For advanced users or custom hosting environments:
1. **[Download from the WordPress Plugin Directory](https://en-gb.wordpress.org/plugins/pureclarity-for-woocommerce/)**
2. Upload the plugin files to your server using your preferred method
3. Activate through the WordPress admin panel
Manual installations require you to handle updates manually. We recommend the direct WordPress installation method for automatic updates and security patches.
## Next Steps
After successful installation, proceed to account setup:
Continue with [Setting up your PureClarity account](/integrations/woocommerce/setting-up-account) to begin personalizing your store.
The PureClarity menu item in your WordPress admin provides access to all configuration options, dashboard analytics, and account management features.
### Method 2: Manual Download Installation
For advanced users or custom hosting environments:
1. **[Download from the WordPress Plugin Directory](https://en-gb.wordpress.org/plugins/pureclarity-for-woocommerce/)**
2. Upload the plugin files to your server using your preferred method
3. Activate through the WordPress admin panel
Manual installations require you to handle updates manually. We recommend the direct WordPress installation method for automatic updates and security patches.
## Next Steps
After successful installation, proceed to account setup:
Continue with [Setting up your PureClarity account](/integrations/woocommerce/setting-up-account) to begin personalizing your store.
The PureClarity menu item in your WordPress admin provides access to all configuration options, dashboard analytics, and account management features.